|
|
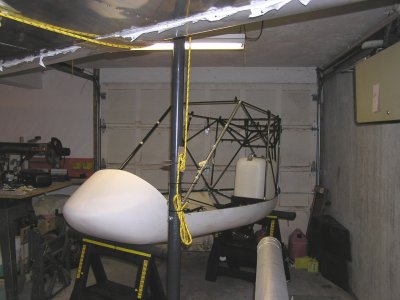
One of the things I like to point out about
building airplanes is, Don't let a percieved
lack of space hold you back.
Find a way.
This shot shows several things:
-
Our cabin sitting on a pair of Stanley,
adjustable saw horses.
We put common pipe insulation over them to
cushion the cabin.
-
Our wing is overhead on the wing-hoist we
made.
-
The main boom tube is visible in the lower
right.
|
|
|
|
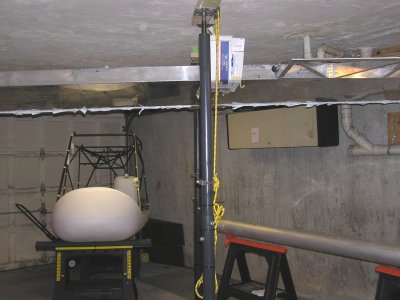
Another shot of our work area.
The boom tube is sitting on another pair of
Stanley workhorses.
These are available at Home Depot, Lowes, et
cetera.
I highly recommend them.
|
|
|
|
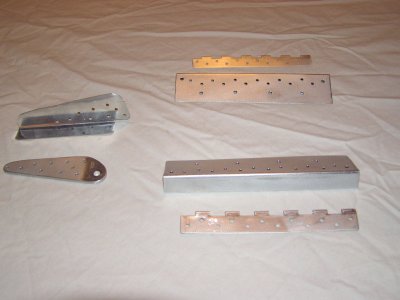
Several pieces have to be added to the
ailerons before they can be mounted.
Clockwise from the top right.
-
Aileron hinge half one and hinge doubler
-
Aileron hinge half two and hinge doubler
-
Aileron control horn
-
Control horn doubler (more on this in the
next frame)
You'll notice that we've removed the pins
from the hinges. I feel this is the only
sane way to deal with mounting the
ailerons and flaps.
Before you knock out the hinge pins, be sure
to label both sides so that you can match
them back up later.
I just used a simple finishing nail, with the
point filed flat, to knock out the original
pins.
We made temporary pins out of common coat
hangers to use during assembly. These slide
in and out of the hinges much easier.
|
|
|
|
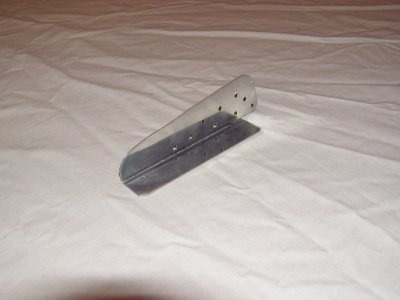
I normally don't add anything to the Odyssey
kit. I've seen too many homebuilt projects
come in extremely overweight.
But, in this case, I decided that a doubler
behind the aileron control horn would be a
good thing.
If you want to do something similar, I
recommend using a common index card as a
pattern. Cut it up with a pair of scissors
and fold it until it fits just right. Then,
just flatten it out and use it as a pattern.
|
|
|
|
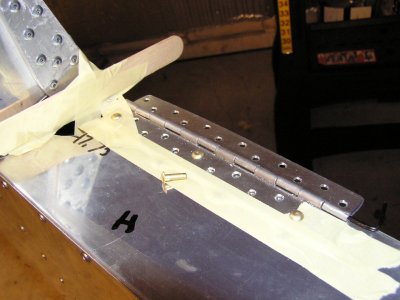
This photo is a bit out of phase because it
shows a flap hinge being aligned, rather than
an aileron hinge. But, here's the technique
we use.
-
Start with one hinge half and locate it
with respect to the wing skin it belongs
to.
-
Tape down the ends of the hinge.
-
We use some common buck rivets to help
stabilize the hinge half. You can buy these
by the pound at Wicks or Aircraft Spruce.
-
Put two or three rivets in and check your
alignment.
-
Cover rivet area with tape.
-
Drill the remaining holes.
-
Cover all the rivet heads with tape
Once you have all the holes drilled, temp
riveted and taped, the hinge is actually
strong enough to test.
|
|
|
|
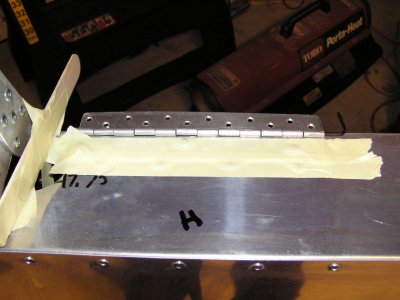
This shot shows the rivet area before the
remaining holes are drilled.
Once you have all the holes drilled, temp
riveted and taped, the hinge is actually
strong enough to test.
If you look carefully, you can see one of our
temporary, coat hanger, hinge pins.
The popsicle stick is a spacer that we tape
to an aileron bolt when the flaps are
mounted. It makes sure that 1/16th of an inch
space is maintained between the aileron horn
bolt and the flap.
|
|
|
|
This shot shows mounting the second half of
an aileron hinge.
We use the same, taping, and temporary
rivetting technique as show above. Once
you're done, you can actually test the
aileron movement before final glueing and
riveting
|
|
|
|
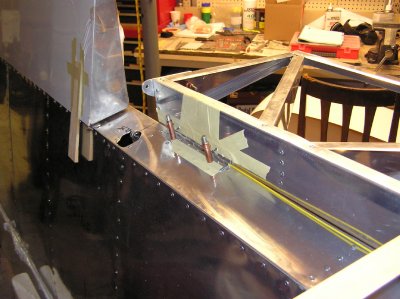
This shot shows how we use one of the
stainless steel yard sticks to represent a
continuation of the wing skin.
It also shows how we use a length of masking
tape to limit the travel of the aileron being
worked on.
|
|