|
|
To begin with, I'd like to talk a bit about
some of the tools and techniques we're using
as we proceed on the wing assembly.
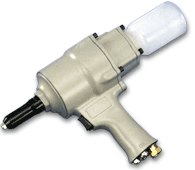
One of our most valued tools is this BossTool
riveter
This tool is the lightest and most powerful
riveter I've ever owned. And, more than that,
it only costs about $90.00.
My strongest recommendation is, "Get
One".
|
|
|
|
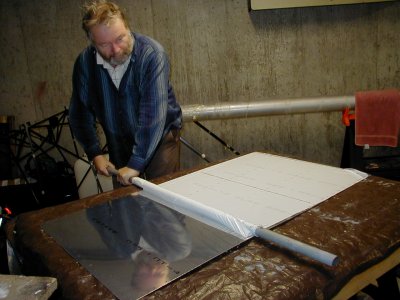
All of the wing skins come from the factory
with protective plastic coating on both
sides.
Removing it with your fingers is a royal
pain. So, here's what we did.
Just get a common pipe or broom handle and
get the first inch or so of the plastic
loose.
Wrap it up, onto the pipe, and start rolling.
Believe me, folks, this is a lot less hassle.
|
|
|
|
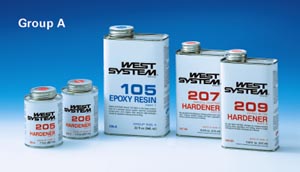
Mark sends out some two part epoxy with the
Odyssey kits. However, we decided to use the
West
System epoxies.
*** However, YOU SHOULD USE MARK'S GLUE. Mark told us West
Systems would be okay. But others must have asked him about
it. Mark now says the glue he sends is more flexible and he believes
better for this application. So now that we know that, we
recommend you us MARK's GLUE. (added later) ***
This product line has been around since the
Romans and is both widely used and respected
throughout industry.
The product is readily available at most boat
shops and the major experimental aircraft
catalog sites.
Benefits:
-
Different hardening speeds are available
-
Multiple Fillers are available so that you
can adjust the viscosity of your mix
-
Inexpensive dispensing pumps make mixing a
batch easy and mess free
|
|
|
|
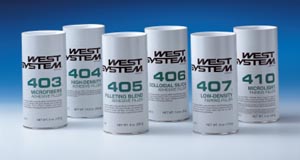
Many different fillers are available for the
system.
We use the type 406. You can learn more about
this at the West System
site.
The epoxy without fillers has the consistency
of common paint. When you're working on
vertical surfaces, or in a situation where
gap filling is important, adding some filler,
dramatically, reduces the amount of epoxy
drip.
|
|
|
|
Saving the best for last.
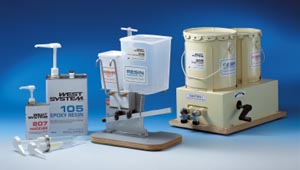
West Systems makes some inexpensive,
calibrated dispensing pumps. You just do one
push of part A and one push of part B and
away you go.
What's more, the pumps can be left on the
cans until they're used up. There's no need
to remove them between gluing sessions.
Ask anyone who's had to work with epoxy. This
is a BIG deal.
|
|
|
|
All of the rivet lines for both stiffeners
and ribs have to be roughed up with 220 grit
sandpaper so that the epoxy has something to
bite on.
However, you definitely need to avoid,
needlessly, roughing up the Al_Clad where
gluing isn't needed.
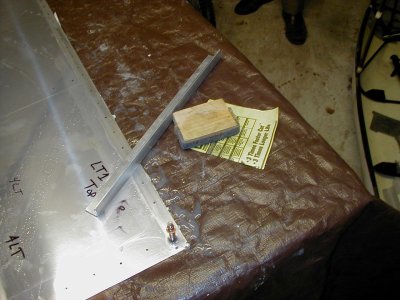
I made these simple aids to assist in this
process.
-
Sanding Block with a piece of
weatherstripping felt, stapled, on one side.
-
One inch, Aluminumn angle "iron" as a
sanding guide. The corners of the angle
iron are sanded completely smooth so that
they can not scratch the sheet.
-
A tarp covered, wooden surface to attach
the wing skin to.
|
|
|
|
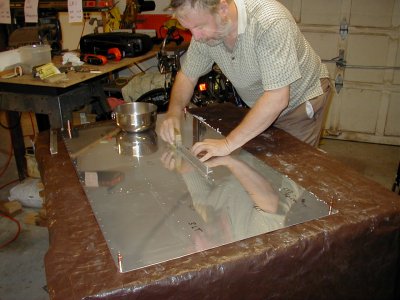
Here's the process in action.
-
Attach the sheet to your table with a few
clecoes
-
Dip your sanding block into some water.
-
Line up your aluminum angle iron so that
the contact patch of the sandpaper covers
the rivet line you want to prepare.
-
Sand away with the angle iron as your
guide.
Granted, the aluminum angle iron will
gradually be worn away. What's more, the tarp will be
full of clecoe holes. But, you'll be done
with your Odyssey long before the aluminum angle iron
wears out. And, the cheapo tarps are available for a buck-two
ninety eight.
|
|


